简介
近期需要搭建一个展示图数据库的前端平台,之前用了很长一段时间的 AngularJS 1.3 ,但是前端技术发展非常快,在我没写前端的短短一年时间中,Angular 已经从 2.0 版本来到了 7.0 。但是 Angular 真正的大变化基本上还是在 1.0 到 2.0,基本上就是完全不同的两个框架了。
本次我用 Vue.js 来搭建这个平台。对于 Vue.js 我也是听闻已久,借此次机会学习一下 Vue.js。至于为什么选择Vue.js,原因如下:
- AngularJS(1.x)使用脏检查,当 watcher 越来越多时会变得越来越慢,因为作用域内的每一次变化,所有 watcher 都要重新计算。AngularJS 用户常常要使用深奥的技术,以解决脏检查循环的问题。
- Vue.js 的学习曲线不像Angular2那样陡峭,而且更加灵活、轻便。具体见 Vue对比其他框架 。
- Vue 非常火!
Vue-CLI
Vue 提供了一个官方的 CLI,为单页面应用 (SPA) 快速搭建繁杂的脚手架。它为现代前端工作流提供了 batteries-included 的构建设置。只需要几分钟的时间就可以运行起来并带有热重载、保存时 lint 校验,以及生产环境可用的构建版本。更多详情可查阅 Vue CLI 的文档。
安装方法:
1 | npm install -g @vue/cli |
本次我进行了一些粗略的应用,使用 Vue-CLI 创建了项目:
1 | vue create graph-visualization |
因为要用到路由,我选择了 Manually select features 。
1 | Vue CLI v3.0.5 |
项目包的选择,我选择了 Babel 、Router 、Linter / Formatter 。
1 | Vue CLI v3.0.5 |
这个设定路由的模式,设定成 history mode 可以让路由变成传统的路径。默认 hash 模式时使用 URL 的 hash 来模拟一个完整的 URL,于是当 URL 改变时,页面不会重新加载。如果不想要很丑的 hash,我们可以用路由的 history 模式,这种模式充分利用 history.pushState API 来完成 URL 跳转而无须重新加载页面。当你使用 history 模式时,URL 就像正常的 url,例如 http://yoursite.com/user/id,也好看!
1 | Vue CLI v3.0.5 |
接下来选择了最基本的 ESLint 模式,ESLint 用于代码错误提示和纠错 ESLint with error prevention only ,以及 Lint on save ,最后两个选项无关紧要,选择保存配置在 package.json 和不保存目前配置。
iView
iView 是一套基于 Vue.js 的高质量 UI 组件库。官网 https://www.iviewui.com/ 。组件库的作用就是库里面帮你写好了很多常用的样式。
安装方法:
1 | npm install --save axios vue-axios |
比如在 .vue 文件的 <template></template> 中加入以下代码:
1 | <Button>Default</Button> |
就会出现以下效果:
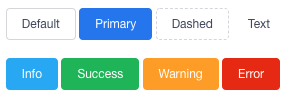
还有很多其他的样式,iView 的做法一般是把普通的标签首字母大写,这样就变成了 iView 的标签,比如 <input> 变成了<Input> ,就会有更加美观的输入框。
Vue Router
Vue Router 是 Vue.js 官方的路由管理器。它和 Vue.js 的核心深度集成,让构建单页面应用变得易如反掌。
安装方法:
1 | npm install --save vue-router |
vue-axios
axios 是基于 promise 用于浏览器和 node.js 的 http 客户端。vue-axios 就是 在 Vue 中使用 axios。在本项目中我利用 axios 获取本地 json 文件或者向服务器发送 get 请求。
安装方法:
1 | npm install --save axios vue-axios |
使用方法:
1 | Vue.axios.get(api).then((response) => { |
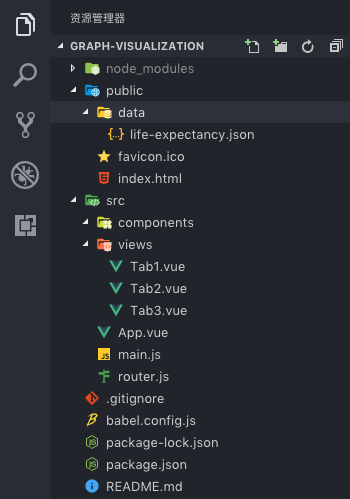
路径说明
node_modules: NPM 安装的包public: index 入口,以及一些静态文件src: 主要项目路径components: Vue 编写的组件views: Vue 编写的页面App.vue: Vue 最外层的页面main.js: Vue 全局控制router.js: Vue 路由编写
main.js
1 | import Vue from "vue"; |
main.js 里面包含了导入的包,可见我导入了Vue,iView,axios 以及 ECharts。此外我还导入了本目录下的两个文件:./router ,./App.vue ,此外还有iView需要的 CSS 文件 iview/dist/styles/iview.css 。
router.js
1 | import Vue from "vue"; |
路由的设置比较清楚,每个页面设置了以下三个属性:
path: Url 路径,\就是刚进入时看到的页面。name: 这个页面的名字。component: 设置了这个页面的组件是哪一个,对应一个.vue文件。
App.vue
1 | <template> |
在 App.vue 文件中定义了整个页面的框架,因为我们是单页应用,所以所有页面都在App.vue 中活动,下面提到的 Tab1.vue,Tab2.vue,Tab3.vue 文件中的内容会通过路由被嵌入到 <router-view/> 中。这个就是通过路由构造单页应用的神奇之处。上述文件中导航栏中添加了路由信息:<MenuItem router-link to="/tab2" name="1-2">Option 2</MenuItem> ,其中 router-link to="/tab2“ 将这个链接指向了 /tab2 页。
export default {} 中 data () {} 用来设置参数 tabName 的初始值,watch 用来 监视 $route 的变化,并将新的 $route.name 赋值给 tabName ,从而实现了在页面切换的时候,<BreadcrumbItem> 中的值会变成路由的名字。
每个 .vue 文件主要包括 template ,style ,script 三个部分。
template: 里面写 HTML 代码,特别注意的是需要有一个根标签,也就是说<template></template>标签只能有一个子标签。style: 里面定义了一些 CSS ,如果在<style>标签中添加了scope,那么这些 CSS 的作用域就限定在这个组件中,不会对其他页面造成影响。script: 里面写 js 代码,定义了这个页面中用到的数据和一些方法。
Tab1.vue
1 | <template> |
Tab1 中做了一个 ECharts 的 Demo。需要注意的是,在官方实例的上面需要添加一句 let echarts = this.$echarts; ,这样才能使其在 Vue 中使用。
效果图: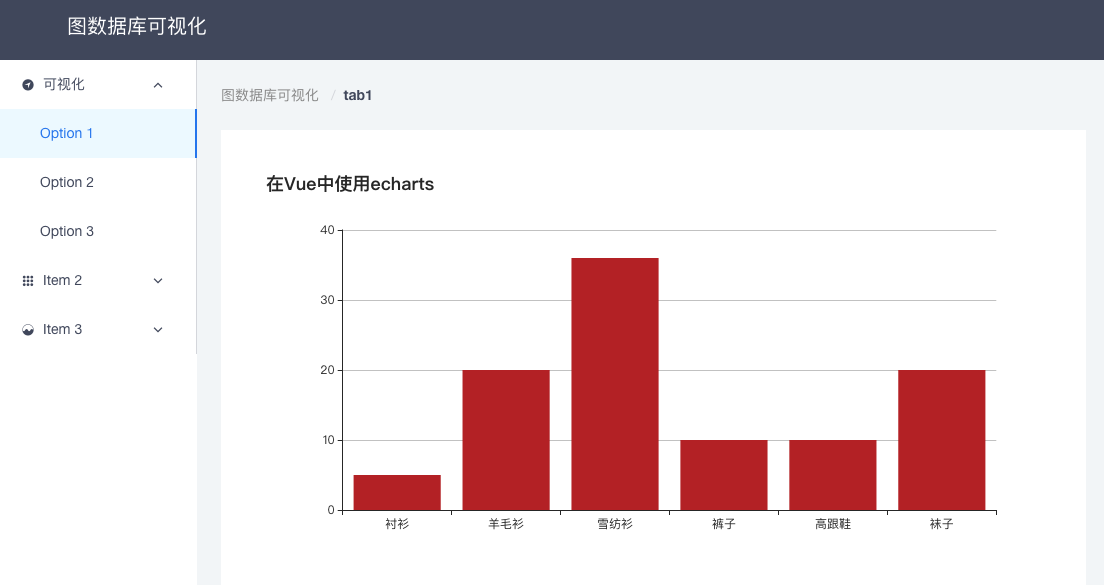
Tab2.vue
1 | <template> |
Tab2 中做了一个通过 vue-axios 的 get 请求获取本地 json 文件内容绘制 ECharts 的 Demo,获取服务器上面的内容同理。需要注意的是,本地文件要放在 public 文件夹下,不然是访问不到的。本文中省略了 option 中的设置,具体设置可以在 ECharts 各国人均寿命示例 中找到。
export default {} 中 mounted () {} 是在该页面被挂载的时候会运行的函数,在 Tab2 中设定了在挂载就会运行 this.drawLine() ,this 会指向本页面的变量、方法等。
效果图: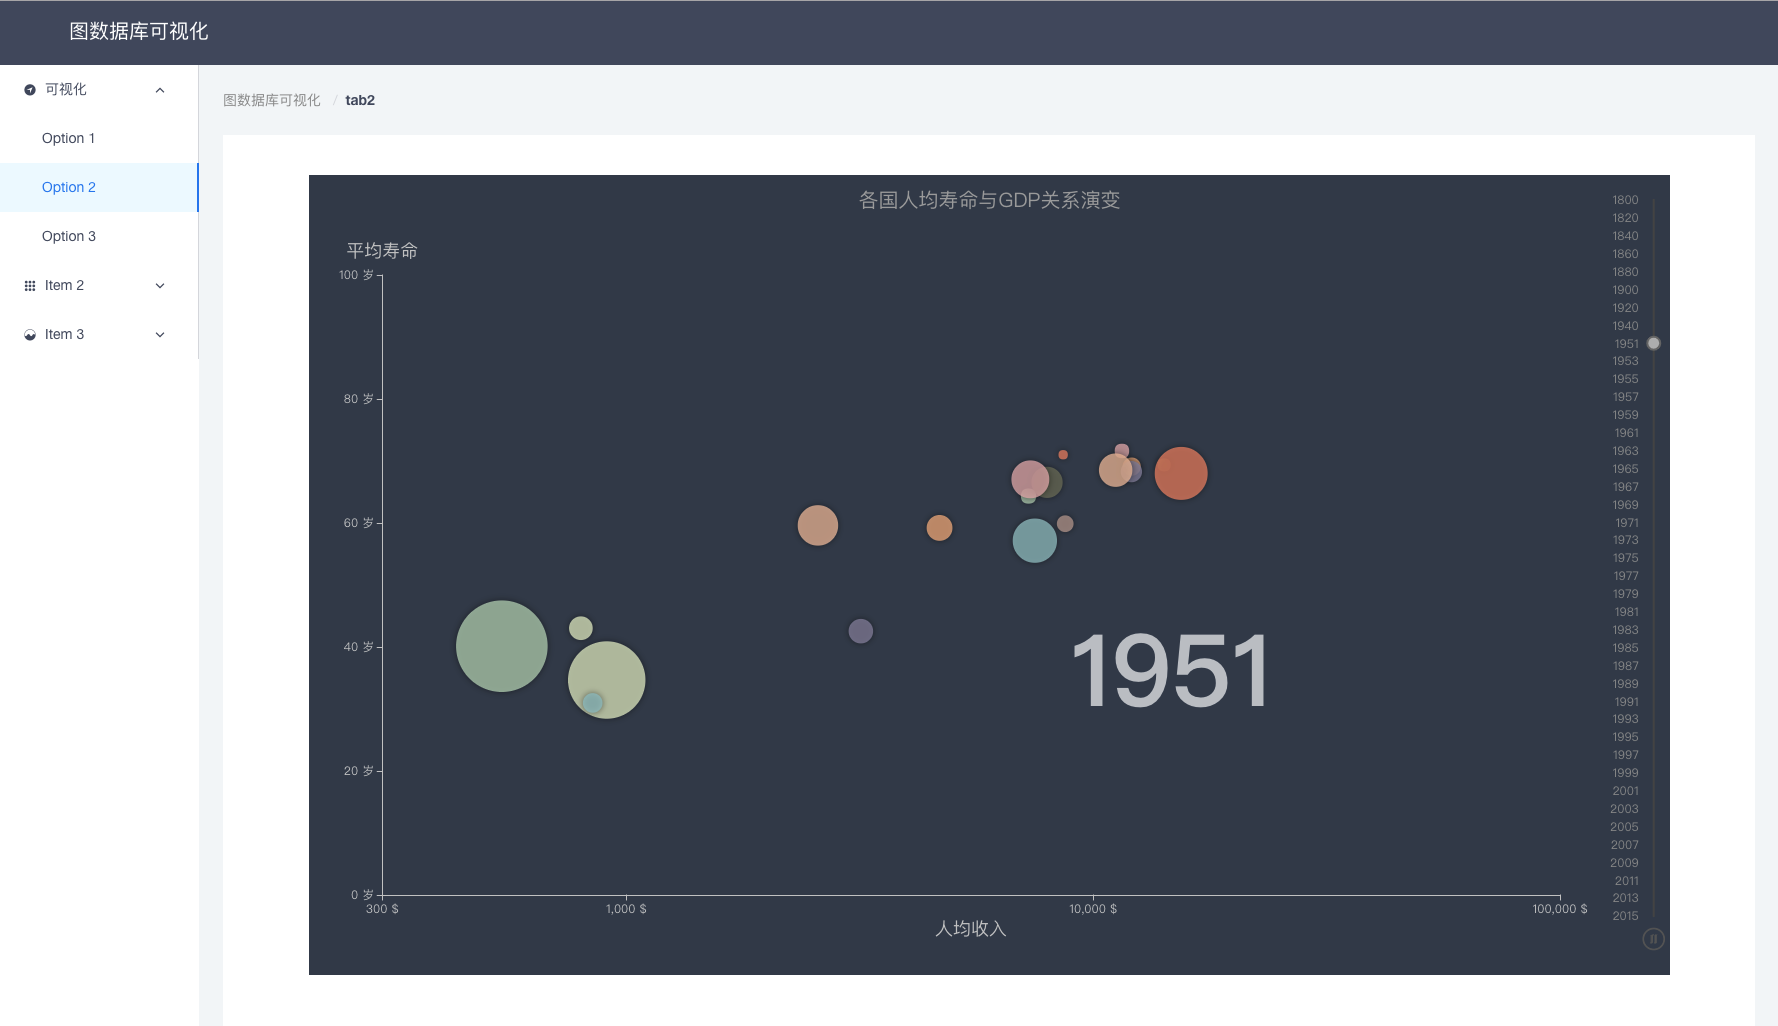
Tab3.vue
1 | <template> |
Tab3 是一个 Vue 表单的 Demo。到后来图数据库的展示需要通过输入框获取信息,于是做了一个样例。
效果图: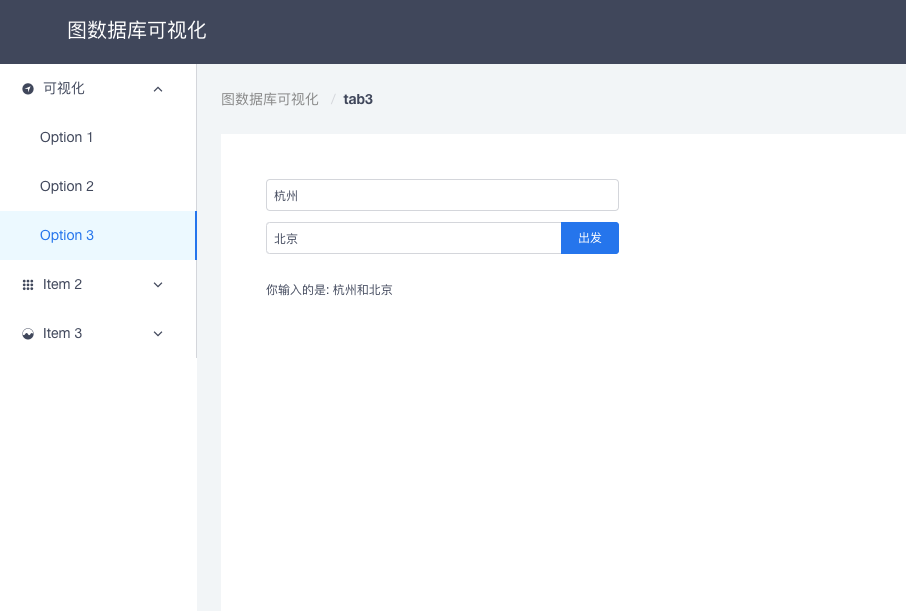
设置了出发地和目的地初始值分别为杭州和北京,点击出发按钮会在页面右上角出现横幅:

在出发地或者目的地其中一个为空的时候会有提示:

这里用了两次的 ? : 三元运算符,其实也可以通过 v-show 实现。具体实现就不多提了,代码还是很清晰的,如果没看懂建议补 Vue 的基础知识,比如 v-if 等用法。至于横幅的实现部分 this.$Notice.open({}); ,这个是 iView 的通知组件,在其官网就可以看到用法。
总结
这个项目在我学习了一天 Vue 以后就简单实现了,可见 Vue 是不难学的,当然这之前需要一些其他知识的铺垫,比如 Node.js,NPM,MVC 等。之后深入的内容有机会再学咯。